How to Spray Paint Cabinets Like a Professional. Kitchen renovations can cost thousands of dollars, but transforming your space doesn’t have to break the bank. Learning how to spray paint cabinets is one of the most cost-effective ways to give your kitchen a complete makeover. This technique can save homeowners up to 80% compared to cabinet replacement, making it an increasingly popular choice for budget-conscious renovators.
Professional cabinet painting services typically charge between $3,000-$8,000 for an average kitchen, while DIY cabinet spray painting can cost as little as $200-$500 in materials. The dramatic transformation achievable through spray painting has made this method a favorite among home improvement enthusiasts and professional contractors alike.
Why Choose Spray Painting Over Traditional Cabinet Refinishing Methods
Spray paint cabinets offer several distinct advantages over brush painting or cabinet replacement. The spray application method creates an ultra-smooth, professional finish that’s nearly impossible to achieve with traditional brushes or rollers. This technique eliminates brush marks, provides even coverage, and significantly reduces application time.
According to industry data from the National Association of Home Builders, spray-painted cabinets can increase home value by 5-10% when executed properly. The smooth, factory-like finish appeals to modern homebuyers who expect high-quality finishes throughout the home. Additionally, spray painting allows for precise color matching and can accommodate complex cabinet designs with intricate details that would be challenging to paint with traditional methods.
The durability factor is another compelling reason to choose spray painting. High-quality cabinet spray paints are formulated to withstand daily kitchen use, including heat, moisture, and frequent cleaning. Many premium spray paint systems offer 10-15 year warranties when applied correctly, rivaling the longevity of factory finishes.
Essential Tools and Materials for Cabinet Spray Painting
Professional-Grade Equipment
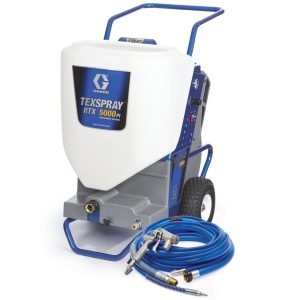
Successful cabinet spray painting requires specific tools and materials. The most critical component is a high-volume, low-pressure (HVLP) spray gun or airless paint sprayer designed for cabinet work. Professional painters typically recommend HVLP systems for their superior finish quality and reduced overspray.
Essential Equipment List:
- HVLP spray gun or airless sprayer
- Air compressor (for HVLP systems)
- Fine-tip spray nozzles (1.4mm-1.8mm)
- Pressure regulator and moisture trap
- Professional paint booth or well-ventilated workspace
- Dust collection system or exhaust fans
Paint and Primer Selection
Choosing the right paint system is crucial for long-lasting results. Cabinet spray paint formulations differ significantly from standard wall paints, featuring enhanced adhesion properties, increased durability, and self-leveling characteristics that create smooth finishes.
Recommended Paint Types:
| Paint Type | Durability Rating | Dry Time | Best For |
|---|---|---|---|
| Alkyd Enamel | Excellent | 4-6 hours | Traditional kitchens |
| Acrylic Lacquer | Superior | 30 minutes | Modern, high-use kitchens |
| Conversion Varnish | Outstanding | 2-4 hours | Commercial-grade durability |
| Hybrid Alkyd | Very Good | 2-3 hours | DIY-friendly option |
Premium cabinet paints like Benjamin Moore Advance, Sherwin Williams ProClassic, or Behr Alkyd Semi-Gloss are specifically formulated for cabinet applications. These paints offer superior flow and leveling properties essential for achieving professional results when you spray paint cabinets.
Step-by-Step Cabinet Preparation Process
Thorough Cleaning and Degreasing
Proper preparation accounts for 70% of a successful cabinet spray painting project. Kitchen cabinets accumulate years of grease, cooking residue, and general grime that must be completely removed before painting. Professional painters use a two-step cleaning process to ensure optimal paint adhesion.
Start with a degreasing solution specifically designed for kitchen surfaces. TSP (Trisodium Phosphate) or commercial degreasers like Krud Kutter effectively break down accumulated grease and grime. Apply the degreaser with a microfiber cloth, allowing it to penetrate for 10-15 minutes before wiping clean with a damp cloth. Follow up with a second cleaning using isopropyl alcohol to remove any remaining residue and ensure complete cleanliness.
Disassembly and Hardware Removal
Systematic disassembly is crucial for achieving professional results. Remove all cabinet doors, drawers, and hardware before beginning the spray painting process. Label each component with painter’s tape to ensure proper reassembly. This organization system prevents confusion and ensures doors return to their original positions.
Hardware Removal Checklist:
- Cabinet door hinges
- Drawer pulls and knobs
- Drawer slides (if being painted)
- Interior shelf pins
- Magnetic catches or latches
Store all hardware in labeled containers to prevent loss. Consider upgrading hardware during the project, as new handles and knobs can dramatically enhance the overall transformation when you spray paint cabinets.
Surface Preparation and Sanding
Proper surface preparation ensures optimal paint adhesion and longevity. While some newer paint systems claim to adhere without sanding, professional results require mechanical adhesion through light sanding. Use 220-grit sandpaper to lightly scuff all surfaces, creating microscopic scratches that help paint adhere properly.
Focus on high-touch areas like door frames and drawer fronts, which typically have the heaviest buildup of oils and residue. Sand in the direction of the wood grain to avoid cross-grain scratches that may telegraph through the final finish. After sanding, remove all dust using a tack cloth or compressed air.
Mastering the Spray Painting Technique
Spray Gun Setup and Testing
Proper spray gun setup is critical for achieving professional results. Begin by thinning your paint according to manufacturer specifications, typically 5-10% for most cabinet paints. Test the spray pattern on cardboard or scrap material, adjusting air pressure and fluid flow until you achieve a consistent, even pattern approximately 6-8 inches wide.
The ideal spray pattern should be oval-shaped with gradual edges and no heavy concentration in the center. Most HVLP systems operate optimally at 10-15 PSI at the cap, significantly lower than conventional spray guns. This lower pressure reduces overspray and provides better transfer efficiency.
Application Techniques for Smooth Finishes
Professional cabinet spray painting requires consistent technique and proper environmental conditions. Maintain a 6-8 inch distance from the surface, moving the spray gun in smooth, overlapping passes. Each pass should overlap the previous by 50% to ensure even coverage without lap marks.
Key Technique Points:
- Keep the spray gun perpendicular to the surface
- Maintain consistent speed and distance
- Start and stop trigger pulls off the workpiece
- Apply thin, even coats rather than heavy applications
- Allow proper flash time between coats
Environmental conditions significantly impact spray painting success. Ideal conditions include temperatures between 70-75°F with relative humidity below 50%. High humidity can cause finish defects like blushing or poor flow-out, while excessive heat can cause the paint to dry too quickly, preventing proper leveling.
Multi-Coat Application Strategy
Professional results require multiple thin coats rather than fewer thick applications. Most spray paint cabinet projects require 2-3 coats of primer followed by 2-3 finish coats. Allow each coat to cure according to manufacturer specifications before applying subsequent coats.
The first coat should be applied lightly to establish a base layer. Subsequent coats can be applied slightly heavier to build opacity and hide any underlying imperfections. Light sanding with 400-grit sandpaper between coats removes any dust nibs or imperfections, ensuring an ultra-smooth final finish.
Color Selection and Design Considerations
Popular Cabinet Color Trends
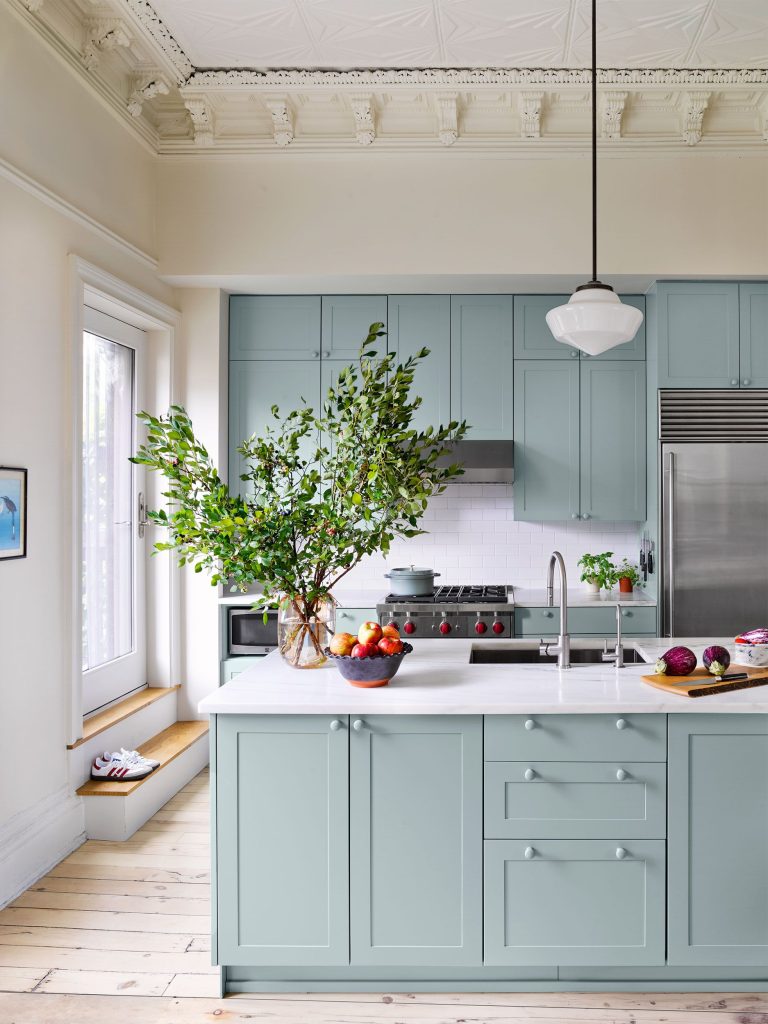
Cabinet color selection dramatically impacts your kitchen’s overall aesthetic and can influence home value. Current trends favor both timeless neutrals and bold statement colors, depending on the home’s style and the homeowner’s preferences.
Trending Cabinet Colors for 2025:
- Classic White – Remains the most popular choice, offering timeless appeal and broad market acceptance
- Soft Gray – Provides modern sophistication while maintaining neutral versatility
- Navy Blue – Creates dramatic contrast and pairs beautifully with brass or gold hardware
- Forest Green – Offers organic warmth and works well with natural wood accents
- Warm Beige – Provides cozy sophistication and complements various design styles
When you spray paint cabinets, consider your kitchen’s natural light exposure. North-facing kitchens benefit from warmer colors, while south-facing spaces can handle cooler tones. Test paint colors in different lighting conditions throughout the day to ensure satisfaction with the final result.
Hardware Coordination
Cabinet hardware serves as jewelry for your newly painted cabinets. The finish and style of handles, knobs, and hinges should complement both the paint color and your kitchen’s overall design aesthetic. Consider upgrading hardware as part of your cabinet transformation project.
Hardware Finish Recommendations:
| Cabinet Color | Recommended Hardware Finishes |
|---|---|
| Classic White | Brushed Nickel, Matte Black, Brass |
| Gray Tones | Stainless Steel, Chrome, Black |
| Navy Blue | Brass, Copper, Gold |
| Green Shades | Oil-Rubbed Bronze, Brass |
| Warm Neutrals | Antique Brass, Copper, Bronze |
Troubleshooting Common Spray Painting Issues
Finish Defects and Solutions
Even experienced painters encounter occasional finish defects when spray painting cabinets. Understanding common issues and their solutions helps achieve professional results and avoid costly mistakes.
Orange Peel Texture: This bumpy, textured appearance results from incorrect spray gun settings or environmental conditions. Solutions include reducing air pressure, thinning paint slightly, or adjusting spray distance. In severe cases, light sanding and recoating may be necessary.
Overspray and Dry Spray: These issues occur when paint particles dry before reaching the surface, creating a rough, sandy texture. Adjust spray gun settings, reduce air pressure, or move closer to the surface. Ensure proper paint viscosity and avoid spraying in excessive heat or wind.
Color Matching and Touch-Up Strategies
Professional spray paint cabinet projects occasionally require touch-ups or color adjustments. Keep detailed records of paint mixing ratios and spray gun settings to ensure consistency across the project. Store leftover paint properly for future touch-ups, as cabinet paints can be difficult to match after extended storage.
For minor imperfections, use small artist brushes to apply touch-up paint, feathering edges to blend with surrounding areas. Larger defects may require localized sanding and respraying to maintain uniform appearance.
Maintenance and Longevity Tips
Proper Curing and Care
Newly spray painted cabinets require proper curing time before normal use. While paint may feel dry to the touch within hours, full cure typically takes 7-30 days depending on the paint system used. During this period, avoid placing heavy objects on shelves or aggressive cleaning that could damage the developing finish.
Curing Timeline by Paint Type:
- Acrylic Lacquer: 7-14 days full cure
- Alkyd Enamel: 14-21 days full cure
- Conversion Varnish: 21-30 days full cure
- Hybrid Systems: 10-21 days full cure
Long-Term Maintenance Strategies
Properly maintained spray-painted cabinets can retain their appearance for 10-15 years or more. Establish a regular cleaning routine using mild soap and water, avoiding abrasive cleaners that could damage the finish. Wipe spills immediately to prevent staining, and use cutting boards and trivets to protect surfaces from heat and scratches.
Annual Maintenance Checklist:
- Deep clean all surfaces with appropriate cleaners
- Inspect hinges and hardware for wear
- Touch up minor chips or scratches promptly
- Lubricate hardware to ensure smooth operation
- Check for loose doors or drawers and adjust as needed
Cost Analysis and Return on Investment
Project Cost Breakdown
Understanding the true cost of spray painting cabinets helps homeowners make informed decisions about this renovation approach. Professional cabinet spray painting typically costs 60-70% less than cabinet replacement while providing similar aesthetic improvements.
DIY Cost Breakdown (Average Kitchen):
| Item Category | Cost Range |
|---|---|
| Paint and Primer | $150-$300 |
| Spray Equipment Rental | $100-$200 |
| Sandpaper and Supplies | $50-$100 |
| Hardware (optional) | $200-$800 |
| Total DIY Cost | $500-$1,400 |
Professional Service Costs:
- Labor: $2,000-$4,000
- Materials: $500-$800
- Total Professional Cost: $2,500-$4,800
The significant cost savings make spray painting an attractive option for homeowners seeking maximum impact with minimal investment.
Market Value Impact
Real estate professionals consistently rank updated kitchens among the most valuable home improvements. When you spray paint cabinets professionally, the improvement typically recoups 70-85% of the investment upon resale, making it one of the highest-return renovation projects available.
According to Remodeling Magazine’s 2024 Cost vs. Value Report, minor kitchen remodels (including cabinet painting) average 85% return on investment nationally. In competitive markets, updated cabinets can be the difference between a quick sale and extended time on market.
Professional vs. DIY Considerations
When to Hire Professionals
While spray painting cabinets is achievable for motivated DIYers, certain situations warrant professional expertise. Complex cabinet designs, extensive damage, or time constraints may justify the additional expense of professional services.
Consider Professional Services When:
- Kitchen remains functional during renovation
- Cabinets have extensive damage or previous poor painting
- Complex architectural details require specialized techniques
- Time constraints don’t allow for proper DIY execution
- Lack of appropriate workspace for spray painting
DIY Success Factors
Successful DIY cabinet spray painting requires careful planning, appropriate workspace, and realistic timeline expectations. Most DIY projects take 2-3 weeks to complete properly, including preparation, painting, and curing time.
DIY Success Requirements:
- Well-ventilated workspace or garage
- Dust-free environment for spray painting
- Adequate time for proper preparation and multiple coats
- Basic carpentry skills for door removal and reinstallation
- Patience for proper curing between coats
The decision between professional and DIY spray painting ultimately depends on available time, skill level, workspace limitations, and budget considerations. Both approaches can yield excellent results when executed properly.
Advanced Techniques and Special Considerations
Spray Painting Different Cabinet Materials
Modern kitchens feature various cabinet materials, each requiring specific preparation and painting techniques. Understanding material-specific requirements ensures optimal results regardless of your cabinet construction.
Laminate Cabinets: Previously considered unpaintable, modern primer technology allows successful painting of laminate surfaces. Use specialized bonding primers designed for slick surfaces, followed by high-quality cabinet paint. Light sanding with 220-grit paper improves adhesion, though some primers claim to bond without sanding.
Wood Cabinets: Natural wood cabinets require careful grain consideration. Open-grain woods like oak may require grain filling for ultra-smooth finishes, while closed-grain species like maple spray beautifully with minimal preparation. Always sand in the direction of the grain to avoid cross-grain scratches.
Previously Painted Cabinets: Existing paint requires evaluation before proceeding. Well-adhered paint in good condition needs only cleaning and light sanding. Failing or incompatible previous finishes may require complete removal through chemical stripping or extensive sanding.
Creating Custom Finishes and Effects
Advanced spray paint cabinet techniques can create unique finishes that rival expensive custom cabinetry. These techniques require additional skill and practice but can significantly enhance your kitchen’s visual impact.
Glazing Techniques: Applied over base paint colors, glazes add depth and character to cabinet finishes. Dark glazes in recessed areas create an aged, traditional appearance, while lighter glazes can soften bold colors. Apply glaze with brushes or rags, then manipulate with various tools to achieve desired effects.
Distressing Methods: For those seeking vintage or farmhouse aesthetics, distressing techniques can age new paint finishes. Light sanding on edges and high-wear areas creates natural-looking wear patterns. Combine with glazing for authentic aged appearances.
Two-Tone Combinations: Mixing different colors on upper and lower cabinets or using accent colors on islands creates visual interest and breaks up large expanses of cabinetry. Ensure color combinations complement your overall design scheme and maintain visual balance.
Specialty Applications and Unique Situations
Certain kitchen configurations present unique challenges requiring specialized approaches. Understanding these situations helps prevent problems and ensures successful project completion.
Glass-Front Cabinets: These require careful masking of glass areas and consideration of interior visibility. Some homeowners prefer removing glass completely during painting, while others opt for precise masking techniques. Consider coordinating with spray paint for glass applications if updating glass elements as well.
Curved or Arched Cabinets: Complex shapes require modified spray techniques and may need hand-brushing in tight areas where spray guns cannot reach effectively. Use high-quality brushes and thin paint slightly for smooth application in these areas.
Island and Peninsula Cabinets: These prominent features often serve as focal points and may warrant different color treatments or higher-quality paint systems due to increased visibility and use.
Industry Best Practices and Professional Standards
Quality Control Measures
Professional cabinet painters follow strict quality control protocols to ensure consistent, high-quality results. Implementing similar standards in DIY projects dramatically improves outcomes and reduces the likelihood of problems.
Inspection Checkpoints:
- Post-Cleaning Inspection: Verify complete grease and residue removal
- Sanding Quality Check: Ensure uniform surface preparation
- Primer Coverage Evaluation: Confirm complete coverage and proper adhesion
- Between-Coat Assessment: Check for defects requiring correction
- Final Quality Review: Inspect completed work under various lighting conditions
Documentation Practices:
- Record paint batch numbers for color consistency
- Document spray gun settings for each coat
- Track environmental conditions during application
- Photograph progress for quality verification
- Maintain material usage records for future reference
Environmental and Safety Considerations
Spray paint cabinets projects involve volatile organic compounds (VOCs) and require appropriate safety measures. Professional painters follow strict safety protocols that DIYers should adopt for personal protection and regulatory compliance.
Essential Safety Equipment:
- NIOSH-approved respirator with organic vapor cartridges
- Eye protection (safety glasses or goggles)
- Protective clothing including coveralls and gloves
- Adequate ventilation systems
- Fire extinguisher rated for paint fires
- First aid supplies and emergency contact information
Environmental Responsibility:
- Proper disposal of paint waste and contaminated materials
- Use of low-VOC or zero-VOC paint systems when possible
- Containment of overspray to prevent environmental contamination
- Compliance with local air quality regulations
- Recycling of packaging materials where possible
Technology and Innovation in Cabinet Painting
Emerging Paint Technologies
The cabinet painting industry continues evolving with new paint formulations and application technologies. These innovations improve durability, reduce environmental impact, and simplify application processes.
Waterborne Technologies: Advanced waterborne paints now match or exceed the performance of traditional solvent-based systems while dramatically reducing VOC emissions. These formulations offer improved flow and leveling properties specifically designed for spray application.
Self-Healing Finishes: Cutting-edge paint technologies incorporate self-healing properties that allow minor scratches and imperfections to disappear over time through heat activation or other mechanisms.
Antimicrobial Additives: Some premium cabinet paints now include antimicrobial additives that inhibit bacterial growth on painted surfaces, providing additional hygiene benefits in kitchen environments.
Digital Color Matching and Visualization
Modern technology simplifies color selection and project visualization. Digital tools help homeowners make confident color decisions before committing to expensive paint purchases.
Color Matching Apps: Smartphone applications can analyze existing colors and suggest complementary paint matches. While not perfectly accurate, these tools provide helpful starting points for color exploration.
Virtual Reality Visualization: Some paint manufacturers offer VR experiences allowing homeowners to visualize different cabinet colors in realistic kitchen environments. This technology reduces the guesswork in color selection and improves satisfaction with final results.
Spectrophotometer Matching: Professional paint stores use spectrophotometers to create precise color matches from sample materials, ensuring accuracy when matching existing elements or creating custom colors.
Ready to transform your kitchen? Start your spray paint cabinets project today and discover how this cost-effective renovation can completely revitalize your space. With proper preparation, quality materials, and attention to detail, you can achieve professional results that will enhance your home’s value and your daily cooking experience.
For more specialized painting projects, explore our guide on spray paint for glass applications to coordinate your cabinet transformation with other kitchen elements.
