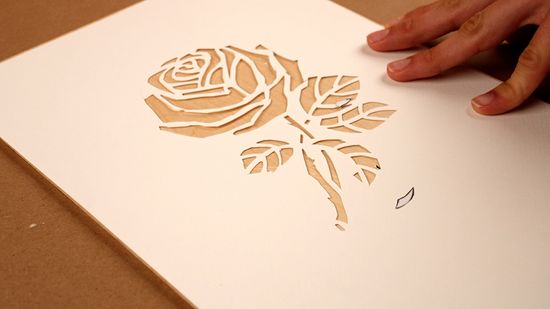
Creating beautiful and precise artwork with a spray paint stencil has become one of the most accessible and rewarding creative techniques available to both beginners and experienced artists. This versatile method allows you to produce consistent, professional-looking designs across multiple surfaces while maintaining crisp, clean lines that would be nearly impossible to achieve through freehand painting alone.
The art of stenciling with spray paint combines traditional craftsmanship with modern convenience, offering endless possibilities for customization and creativity. Whether you’re looking to add personality to your home décor, create branded materials for your business, or develop your artistic skills, mastering spray paint stencil techniques opens up a world of creative opportunities that can transform ordinary surfaces into extraordinary works of art.
Understanding Spray Paint Stencil Fundamentals
What Makes Spray Paint Stenciling Unique
Spray paint stencil work differs significantly from other painting methods due to its precision and repeatability. The process involves creating or using pre-made templates that guide the paint application, ensuring consistent results every time you use the same design. This method excels particularly in situations where you need multiple identical copies of a design or when working with intricate patterns that require perfect symmetry.
The spray application method provides several distinct advantages over brush painting through stencils. The fine mist created by aerosol paint can reach into small crevices and detailed areas that brushes might miss, while the even distribution prevents the paint buildup that often occurs with traditional brush techniques. Additionally, the quick-drying nature of most spray paints means you can remove stencils almost immediately, reducing the risk of paint bleeding under the template edges.
Key Components of Successful Stencil Projects
Every successful spray paint stencil project relies on three fundamental elements: proper stencil design, appropriate paint selection, and correct application technique. The stencil design must account for the properties of spray paint, including its tendency to create soft edges and its ability to penetrate small gaps. This means that stencil cuts should be clean and precise, with adequate spacing between elements to prevent unwanted paint transfer.
Paint selection plays a crucial role in the final outcome of your project. Different spray paint formulations behave differently when applied through stencils, with some creating sharper edges while others provide better coverage. Understanding these characteristics allows you to choose the right paint for your specific application and desired aesthetic outcome.
Essential Materials and Tools for Spray Paint Stencils
Stencil Material Options and Their Properties
| Material Type | Durability | Detail Level | Cost | Best Use Case |
|---|---|---|---|---|
| Cardboard | Low | Medium | Very Low | Single-use projects |
| Plastic Sheets | Medium | High | Low | Multiple uses, curved surfaces |
| Mylar | High | Very High | Medium | Professional work, fine details |
| Metal | Very High | High | High | Commercial applications |
| Vinyl | Medium | Very High | Medium | Adhesive backing, complex curves |
The choice of stencil material significantly impacts both the quality of your results and the longevity of your template. Cardboard stencils work well for one-time projects and offer the advantage of being easily cut with basic craft knives. However, they absorb paint over time and can become soggy, leading to deteriorated edges and potential tearing during use.
Plastic sheet stencils provide a good balance between cost and durability, making them ideal for projects requiring multiple applications. They resist paint absorption and can be cleaned for reuse, though they may become brittle over time with repeated exposure to solvents in spray paint. The flexibility of plastic sheets also makes them suitable for curved surfaces where rigid materials might not conform properly.
Professional-Grade Spray Paint Selection
Acrylic spray paints represent the most versatile option for stencil work, offering excellent adhesion to most surfaces while maintaining good color saturation and durability. These paints typically dry quickly, reducing the risk of smudging when removing stencils, and they’re available in an extensive range of colors and finishes. The relatively low odor and easy cleanup make acrylic sprays particularly suitable for indoor projects and beginners.
Enamel spray paints provide superior durability and weather resistance, making them the preferred choice for outdoor applications and surfaces that will experience heavy wear. However, they typically require longer drying times and may have stronger odors, necessitating better ventilation during application. The harder finish achieved with enamel paints also means they’re more resistant to scratching and fading over time.
Specialty spray paints include metallics, textured finishes, and glow-in-the-dark formulations that can add unique effects to your spray paint stencil projects. These specialized products often require specific application techniques and may have different drying times or coverage characteristics compared to standard formulations.
Step-by-Step Spray Paint Stencil Application Process
Surface Preparation and Setup
Proper surface preparation forms the foundation of any successful spray paint stencil project. Begin by thoroughly cleaning the target surface to remove dirt, grease, and any existing loose paint or debris. For non-porous surfaces like metal or plastic, use a degreasing agent to ensure optimal paint adhesion. Porous surfaces such as wood or concrete may require priming to prevent paint absorption and ensure even coverage.
Surface texture considerations play a crucial role in stencil success. Smooth surfaces provide the best conditions for crisp, clean lines, while textured surfaces may require adjustments to your technique. On rough surfaces, consider using a light base coat of the same color as your stencil paint to fill in texture variations, or apply slightly more pressure when positioning your stencil to ensure good contact with the surface irregularities.
Environmental conditions significantly impact the quality of your results. Ideal working conditions include temperatures between 65-75°F (18-24°C) with low humidity and minimal air movement. Wind can cause overspray issues and make it difficult to control paint application, while high humidity can extend drying times and potentially cause paint to run or sag.
Stencil Positioning and Securing Techniques
Accurate stencil positioning requires careful measurement and marking, especially when working on large surfaces or creating patterns with multiple stencil applications. Use a level and measuring tape to establish reference lines, and mark key positioning points with removable tape or light pencil marks. For complex multi-layer designs, consider creating registration marks on your stencil that align with reference points on your surface.
Securing methods vary depending on the surface and stencil material. Spray adhesive provides excellent hold for most applications and can be applied lightly to the back of the stencil for temporary bonding. This method works particularly well on vertical surfaces where gravity might cause shifting during paint application. However, use spray adhesive sparingly to avoid residue transfer to your finished surface.
Painter’s tape offers a chemical-free securing method that works well on delicate surfaces where adhesive residue might be problematic. Apply tape along the edges of your stencil, ensuring complete contact to prevent paint bleeding. For large stencils, use tape at regular intervals rather than only at corners to prevent lifting during spray application.
Spray Technique and Paint Application
Proper spray technique begins with holding the can at the correct distance from your stencil surface. The optimal distance typically ranges from 6-12 inches, depending on the specific paint formulation and desired coverage intensity. Closer distances provide more concentrated coverage but increase the risk of runs and paint buildup, while greater distances create lighter, more even coverage with reduced detail definition.
Motion patterns significantly impact the quality and consistency of your coverage. Use steady, overlapping passes rather than attempting to cover areas with single, heavy applications. Begin each pass slightly beyond the stencil edge and maintain consistent motion speed throughout the stroke. This technique prevents heavy buildup at the beginning and end of each pass while ensuring even coverage across the entire stenciled area.
Multiple light coats generally produce superior results compared to single heavy applications. Allow each coat to flash dry (become tacky but not fully cured) before applying subsequent coats. This approach builds up color gradually while minimizing the risk of runs, sags, and paint bleeding under stencil edges. For most projects, 2-3 light coats provide optimal coverage and color saturation.
Advanced Spray Paint Stencil Techniques
Multi-Layer Stenciling for Complex Designs
Multi-layer stenciling allows you to create sophisticated designs with multiple colors and intricate details that would be impossible to achieve with single-layer approaches. This technique requires careful planning and precise registration between layers to ensure proper alignment. Begin by creating a master design that breaks down into separate color layers, with each layer representing areas that will receive the same color treatment.
Registration systems become critical when working with multiple layers. Professional approaches include creating alignment holes in each stencil layer that correspond to fixed reference points on your surface, or using removable registration marks that remain visible through multiple painting stages. Some artists prefer to create slightly oversized stencils for background layers, allowing for minor alignment variations while maintaining the overall design integrity.
Color interaction planning requires understanding how different paint colors interact when overlapped or applied in sequence. Light colors generally cannot effectively cover darker colors without multiple coats, so plan your layer sequence accordingly. Consider using intermediate tones or gradual color transitions to achieve smooth blending between different stencil layers.
Gradient and Shading Effects
Creating gradient effects with spray paint stencils requires controlling paint density across the stenciled area. This technique involves varying your spray distance and coverage intensity to create smooth transitions from light to dark areas. Begin with light, even coverage across the entire stenciled area, then build up darker areas gradually with additional passes while maintaining lighter coverage in areas intended to remain bright.
Masking techniques can help create sharp gradient transitions or protect areas that should remain at specific intensity levels. Use additional stencil pieces or removable masks to block areas during selective paint application. This approach allows you to create complex shading patterns and dimensional effects that add depth and visual interest to your spray paint stencil designs.
Blending methods include feathering techniques where you gradually reduce paint coverage at transition areas, and layering approaches where you apply different intensities of the same color to build up dimensional effects. These advanced techniques require practice to master but can produce stunning results that rival traditional brush painting methods.
Texture and Special Effects Creation
Texture simulation through stenciling opens up creative possibilities for adding visual and tactile interest to your projects. Techniques include using textured stencil materials that impart surface patterns to the paint application, or employing specialized spray patterns that create stippled, spattered, or brushed effects. Some artists create custom texture stencils by cutting irregular patterns or using natural materials like leaves or fabric as temporary stencils.
Metallic finishes require special considerations when working with stencils. Metallic spray paints often contain larger pigment particles that can clog fine stencil details, so choose stencil designs with appropriately sized openings. The reflective properties of metallic finishes also mean that surface preparation becomes even more critical, as any imperfections will be highlighted by the reflective surface.
Dimensional effects can be achieved through strategic paint buildup and specialized application techniques. Build up paint thickness gradually in specific areas to create raised details, or use masking techniques to create recessed effects. Some advanced practitioners incorporate multiple spray distances within a single application to create varied paint thickness and visual depth.
Troubleshooting Common Spray Paint Stencil Problems
Paint Bleeding and Edge Quality Issues
Paint bleeding under stencil edges represents one of the most common challenges in spray paint stenciling. This problem typically results from insufficient stencil adhesion, excessive paint application, or improper spray technique. To prevent bleeding, ensure your stencil maintains complete contact with the surface throughout the painting process, and avoid heavy paint applications that can create pressure buildup under stencil edges.
Edge sharpness problems often stem from stencil movement during paint application or from using worn stencils with damaged edges. Address these issues by securing stencils more thoroughly and inspecting stencil condition before each use. Replace or repair stencils showing signs of edge damage, and consider using registration systems that prevent movement during paint application.
Cleanup and correction techniques for bleeding issues include careful scraping with razor blades while paint is still wet, or sanding and repainting after full cure for more severe problems. For future prevention, consider using barrier coats or sealers on surfaces prone to bleeding, and experiment with different stencil materials to find options that provide better edge sealing for your specific applications.
Coverage and Color Consistency Problems
Uneven coverage patterns can result from inconsistent spray technique, inadequate surface preparation, or environmental factors affecting paint flow. Address these issues by maintaining consistent spray distance and motion speed, ensuring proper surface preparation, and monitoring environmental conditions during application. Consider using spray pattern test panels to perfect your technique before working on final surfaces.
Color matching challenges become apparent when working with multiple paint batches or when touching up existing work. Always purchase sufficient paint from the same production batch for complete projects, and maintain detailed records of paint specifications for future reference. For critical color matching situations, consider professional color matching services or digital color analysis tools.
Opacity variations can occur when working over different substrate colors or textures. Address these issues through appropriate primer selection and by adjusting your coating thickness to achieve consistent opacity. Some colors, particularly yellows and reds, may require additional coats or specialized primers to achieve consistent coverage over varying substrates.
Professional Tips and Best Practices
Quality Control and Consistency Maintenance
Stencil maintenance protocols are essential for achieving consistent results across multiple projects. Establish cleaning procedures that remove paint buildup without damaging stencil materials, and develop storage systems that prevent warping or damage between uses. Create inspection checklists that identify wear patterns or damage before they affect project quality.
Documentation systems help maintain consistency across projects and provide valuable reference information for future work. Record paint specifications, application techniques, environmental conditions, and results for each project. This information becomes invaluable when replicating successful techniques or troubleshooting problems in future work.
Quality checkpoints throughout your process help identify problems before they become major issues. Establish inspection points after surface preparation, stencil positioning, and each paint application stage. This systematic approach prevents compounding errors and ensures consistent quality across all your spray paint stencil projects.
Time and Cost Optimization Strategies
Batch processing techniques can significantly improve efficiency when working on multiple similar projects. Group similar operations together, such as cutting multiple stencils at once or preparing multiple surfaces before beginning paint application. This approach minimizes setup time and takes advantage of material and tool economies of scale.
Material cost management involves strategic purchasing and waste reduction practices. Buy materials in appropriate quantities to take advantage of bulk pricing while avoiding waste from unused materials that deteriorate over time. Develop material calculation formulas that accurately predict needs for different project types and sizes.
Tool and equipment optimization includes selecting versatile tools that serve multiple functions and investing in quality items that provide better results and longer service life. Consider the total cost of ownership, including maintenance and replacement costs, when making equipment decisions for your spray paint stencil work.
For more detailed guidance on spray paint application techniques, check out our comprehensive spray paint tips article that covers advanced application methods and troubleshooting strategies.
Whether you’re just starting your journey with spray paint stencil projects or looking to refine your existing techniques, the methods and strategies outlined above provide a solid foundation for achieving professional-quality results. Remember that mastery comes through practice and experimentation, so don’t hesitate to try new approaches and techniques as you develop your skills.
Ready to start your spray paint stencil project? Gather your materials, prepare your workspace, and begin creating the custom designs you’ve been envisioning. With proper preparation and technique, you’ll be amazed at the professional results you can achieve with this versatile and rewarding artistic medium.
