Transforming old, worn, or rusty metal items with spray paint can breathe new life into everything from furniture and fixtures to outdoor equipment and decorative pieces. Whether you’re restoring a vintage metal chair, updating cabinet hardware, or giving your garden tools a fresh look, knowing how to spray paint metal properly makes the difference between a professional-looking finish and a disappointing DIY disaster.
Spray painting metal requires more than just pointing and spraying. Most DIY spray painting is done on relatively small metal objects like shelf brackets, door hardware, bicycle parts, grill attachments and even small propane tanks, but regardless of the project size, achieving that perfect finish demands proper preparation, the right materials, and proven techniques that professional painters use every day.
Understanding Metal Surfaces and Paint Adhesion
Metal presents unique challenges for paint adhesion that differ significantly from wood, plastic, or drywall surfaces. The smooth, non-porous nature of most metals creates difficulties for paint to grip properly, while environmental factors like moisture, temperature fluctuations, and UV exposure can cause premature paint failure if the wrong products or techniques are used.
Different types of metals require specific approaches when learning how to spray paint metal surfaces. Ferrous metals like steel and iron are prone to rust and corrosion, making primer selection critical for long-term durability. Non-ferrous metals such as aluminum, brass, and copper have their own adhesion challenges due to oxidation layers that form naturally on their surfaces. Galvanized metal, commonly used for outdoor applications, has a zinc coating that can reject certain paints if not properly prepared.
The key to successful metal spray painting lies in understanding these material properties and selecting compatible products. Modern spray paint formulations have evolved significantly, with many manufacturers now offering specialized metal paints that combine primer and topcoat in a single application, simplifying the process while maintaining professional results.
Essential Materials and Tools for Metal Spray Painting
Before beginning any metal spray paint project, gathering the right materials ensures smooth workflow and professional results. The foundation of any successful spray painting job starts with quality materials that are specifically designed for metal applications.
Paint Selection Guide
| Paint Type | Best For | Drying Time | Durability |
|---|---|---|---|
| Enamel Spray Paint | High-use items, outdoor applications | 2-4 hours | Excellent |
| Acrylic Spray Paint | Indoor projects, decorative items | 30-60 minutes | Good |
| Rust-Converter Paint | Rusty metal surfaces | 1-2 hours | Excellent |
| Primer + Paint Combo | Quick projects, multiple surfaces | 1-3 hours | Very Good |
Generally speaking, the best spray paint for metal is hard-wearing enamel. Its oil base makes it somewhat slow to dry, but it stands up to cleaning and use well. However, the specific choice depends on your project requirements, environmental conditions, and intended use of the finished item.
Required Tools and Supplies
- High-quality spray paint designed for metal surfaces
- Metal primer (if not using primer-paint combination)
- Sandpaper (120-grit for heavy rust, 220-grit for light prep)
- Steel wool or scuff pads for surface preparation
- Degreasing cleaner or trisodium phosphate (TSP)
- Drop cloths or plastic sheeting for workspace protection
- Painter’s tape for masking areas
- Tack cloth for dust removal
- Respirator mask and safety glasses
- Disposable gloves to prevent skin contact with chemicals
Professional painters recommend investing in quality materials rather than choosing the cheapest options. Premium spray paints often provide better coverage, more even application, and superior durability, ultimately saving time and money by reducing the need for touch-ups or complete repainting.
Surface Preparation: The Foundation of Professional Results
Proper surface preparation represents the most critical step in learning how to spray paint metal effectively. This phase determines whether your paint job will last for years or begin failing within months. While each surface requires slightly different prep work, how you prepare metal for spray painting is even more dependent on the condition of your item.
Cleaning and Degreasing Process
Metal surfaces accumulate various contaminants that can interfere with paint adhesion. Oil, grease, fingerprints, dirt, and manufacturing residues create barriers between the metal and paint, leading to poor adhesion, bubbling, or premature peeling. Begin the preparation process by thoroughly cleaning the entire surface with a degreasing agent.
For most projects, a solution of warm water and dish soap effectively removes light contamination. However, for heavily soiled items or those exposed to automotive fluids, industrial cleaners, or kitchen grease, stronger degreasing agents may be necessary. Trisodium phosphate (TSP) serves as an excellent heavy-duty cleaner and degreaser for metal surfaces, though it requires careful handling and thorough rinsing.
After cleaning, inspect the surface carefully for any remaining contamination. Water should sheet evenly across a properly cleaned surface rather than beading up, which indicates the presence of oils or waxes that require additional cleaning.
Rust Removal and Treatment
Rust presents one of the most common challenges when preparing metal for spray painting. Surface rust can often be removed through mechanical means, while deeper corrosion may require chemical treatment or complete surface replacement in severe cases.
Light Surface Rust: Use 220-grit sandpaper or fine steel wool to remove light rust and surface oxidation. Work in circular motions, applying consistent pressure to avoid creating deep scratches that will show through the paint finish.
Moderate Rust: Start with 120-grit sandpaper to remove heavy rust buildup, then progress to 220-grit for final smoothing. Power tools like orbital sanders can speed this process but require careful control to avoid over-sanding.
Heavy Rust: Consider using a rust converter product that chemically transforms rust into a paintable surface. These products eliminate the need for complete rust removal while providing excellent adhesion for subsequent paint layers.
Creating Proper Surface Texture
If the metal you are painting is smooth you will want to rough it up. You can use sandpaper, a scuff pad, or even steel wool. This step, known as “keying” the surface, creates microscopic scratches that help paint adhere mechanically to the metal.
For new or previously painted metal in good condition, light scuffing with 320-grit sandpaper or a scuff pad provides adequate surface texture. Focus on creating uniform scratches across the entire surface rather than deep gouges in isolated areas. The goal is to dull the surface sheen without creating visible scratches in the final finish.
After sanding, remove all dust and debris using a tack cloth or lint-free rag. Any particles left on the surface will create imperfections in the paint finish, so thorough cleaning at this stage is essential.
Priming Techniques for Maximum Adhesion
Primer serves as the critical bridge between the metal surface and the topcoat, providing adhesion, corrosion protection, and a uniform base for color development. While some modern spray paints include primer in their formulation, dedicated primer applications often provide superior results, especially for challenging surfaces or high-durability requirements.
Primer Selection for Different Metals
Ferrous Metals (Steel, Iron): Use rust-inhibiting primers specifically formulated for ferrous metals. These primers contain corrosion inhibitors that prevent rust formation even if moisture penetrates the topcoat. Epoxy-based primers offer excellent adhesion and chemical resistance for industrial applications.
Non-Ferrous Metals (Aluminum, Brass, Copper): Self-etching primers work best on these surfaces, as they chemically bond with the metal oxide layer. These primers contain mild acids that create microscopic etching patterns while simultaneously depositing primer material.
Galvanized Metal: Specialized galvanized metal primers accommodate the zinc coating’s unique properties. Standard primers may not adhere properly to galvanized surfaces, leading to paint failure.
Application Techniques
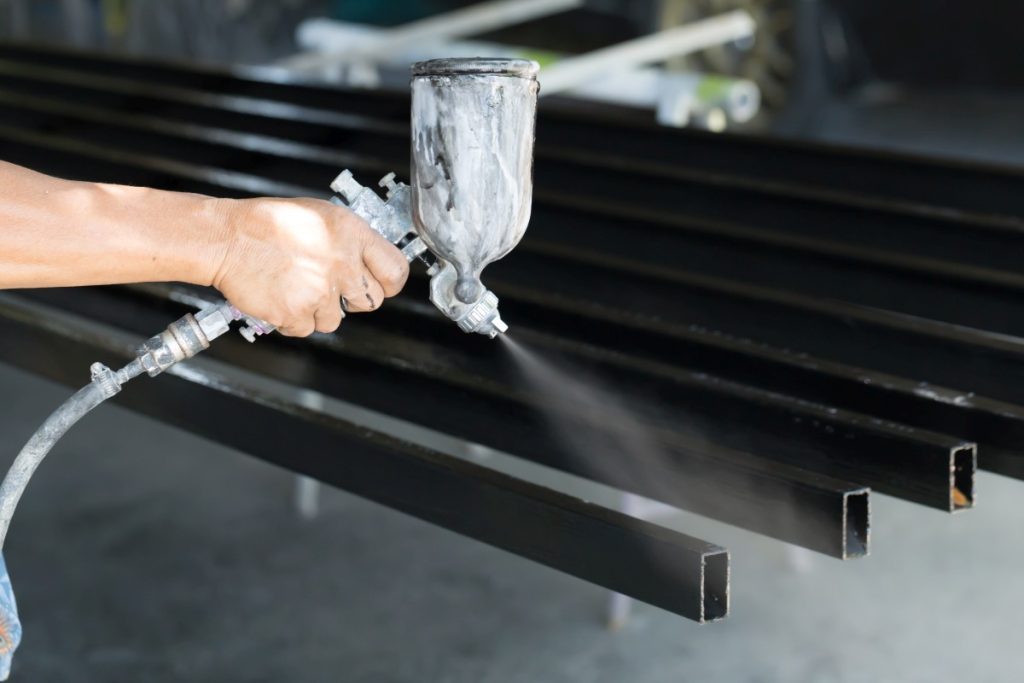
Hold the can about 8 to 12 inches from the object you’re painting and keep the can moving in smooth, overlapping passes. This distance provides optimal spray pattern coverage while preventing runs and drips that occur when holding the can too close to the surface.
Apply primer in thin, even coats rather than trying to achieve full coverage in a single application. Multiple thin coats provide better adhesion, more even coverage, and fewer application defects than single heavy coats. Allow each coat to dry according to manufacturer specifications before applying subsequent layers.
Professional painters often apply primer in a crosshatch pattern, with the first coat applied horizontally and the second coat applied vertically. This technique ensures complete coverage and eliminates potential thin spots that could lead to corrosion or paint failure.
How to Spray Paint Metal: Step-by-Step Application Process
Once surface preparation and priming are complete, the actual spray painting process requires technique, timing, and attention to environmental conditions. Apply several light coats, letting the paint dry for a few hours between coats for the best results and longest-lasting finish.
Environmental Considerations
Temperature, humidity, and air movement significantly impact spray paint application and drying. Ideal conditions include temperatures between 65-75°F (18-24°C) with relative humidity below 50%. Avoid painting in direct sunlight, which can cause rapid drying and surface defects, or in windy conditions that can contaminate the wet paint surface with debris.
Indoor painting requires adequate ventilation to remove paint vapors and provide fresh air circulation. However, too much air movement can cause overspray and uneven application, so balance ventilation needs with spray control requirements.
Spray Technique and Pattern Control
Begin each spray pass slightly before the item and continue slightly past it, maintaining consistent speed and distance throughout the stroke. This technique, called “triggering off the part,” ensures even paint distribution at the beginning and end of each pass, preventing heavy buildup at turn-around points.
Overlap each pass by approximately 50% to ensure complete coverage without creating visible lap marks. Hold the spray can perpendicular to the surface rather than angling it, which can create uneven spray patterns and poor coverage.
For complex shapes or items with intricate details, work from the inside out, painting recessed areas first before moving to flat surfaces. This approach prevents overspray from accumulating in detailed areas and ensures complete coverage of all surfaces.
Multiple Coat Application
Apply up to three thin coats of spray paint for best results, allowing proper drying time between applications. The first coat often appears somewhat transparent or uneven, which is normal and expected. Resist the temptation to apply heavy coats to achieve full coverage quickly, as this approach leads to runs, sags, and poor durability.
Each subsequent coat should be applied perpendicular to the previous coat when possible, creating a crosshatch pattern that ensures complete coverage and eliminates directional brush marks or spray patterns. For example, if the first coat was applied horizontally, apply the second coat vertically.
Monitor paint buildup carefully, especially on edges and corners where paint tends to accumulate. These areas may require lighter application or careful blending to maintain uniform thickness across the entire surface.
Troubleshooting Common Spray Painting Problems
Even experienced painters encounter occasional problems when spray painting metal. Understanding common issues and their solutions helps achieve professional results consistently while saving time and materials on problem resolution.
Paint Adhesion Failures
Problem: Paint peels, chips, or flakes off the metal surface shortly after application.
Causes: Inadequate surface preparation, presence of contaminants, incompatible primer and topcoat combination, or application over existing paint in poor condition.
Solutions: Remove all loose paint, clean the surface thoroughly with degreasing agents, sand to create proper surface texture, and apply appropriate primer before repainting. For severe adhesion failures, complete paint removal may be necessary.
Orange Peel Texture
Problem: The painted surface has a bumpy, textured appearance resembling orange peel.
Causes: Incorrect spray distance, improper paint viscosity, excessive air pressure, or environmental conditions that cause rapid paint drying.
Solutions: Maintain proper spray distance (8-12 inches), ensure paint is at recommended temperature, reduce air pressure if using spray equipment, and improve environmental conditions. Light sanding between coats can minimize texture buildup.
Runs and Sags
Problem: Paint flows and creates vertical streaks or drips on the surface.
Causes: Applying paint too heavily, holding the spray can too close to the surface, or moving too slowly during application.
Solutions: Apply thinner coats with proper spray distance, maintain consistent movement speed, and allow adequate flash time between coats. Sand out runs after they cure completely, then apply additional thin coats.
Color Matching and Uniformity Issues
Problem: Color appears uneven, blotchy, or doesn’t match expectations.
Causes: Inadequate primer coverage, varying surface porosity, contamination, or color variation between paint batches.
Solutions: Ensure complete primer coverage before applying color coats, use consistent application techniques, and purchase sufficient paint from the same batch for the entire project.
Advanced Techniques for Professional Finishes
Professional metal spray painting techniques go beyond basic application methods to achieve superior results that rival factory finishes. These advanced approaches require additional time and materials but produce exceptional durability and appearance for high-visibility projects.
Wet Sanding Between Coats
This technique involves lightly sanding each dried coat with very fine sandpaper (400-600 grit) used with water or sanding solution. Wet sanding removes small imperfections, dust particles, and surface irregularities while maintaining the smoothness necessary for subsequent coats.
After wet sanding, thoroughly clean the surface with tack cloth and allow complete drying before applying the next coat. This process is repeated between each coat, with the final coat receiving wet sanding followed by polishing compound for maximum gloss and smoothness.
Multiple Primer Applications
For maximum corrosion protection and paint durability, professional applications often include multiple primer coats with different properties. A base coat of corrosion-inhibiting primer provides chemical protection, followed by a high-build primer that fills minor surface imperfections and provides an ideal surface for topcoat adhesion.
Each primer coat receives light sanding to ensure smoothness and proper adhesion for subsequent layers. While this approach requires additional time and materials, the resulting finish durability and appearance justify the extra effort for critical applications.
Clear Coat Protection
Applying a clear protective coating over the color provides additional durability, UV protection, and enhanced gloss retention. Clear coats are particularly valuable for metal items exposed to outdoor conditions or heavy use, such as furniture, equipment, or decorative elements.
Select clear coats that are compatible with the underlying color coat and provide the desired level of gloss. Satin clear coats offer protection while maintaining a natural appearance, while high-gloss clear coats provide maximum durability and easy cleaning characteristics.
Paint Types and Brand Comparisons
Understanding the various spray paint options for metal helps select the best product for specific applications and environmental requirements. Different paint chemistries offer unique advantages and limitations that should match project needs.
Rust-Oleum Universal Metallics
Advantages: Excellent coverage, wide color selection, good durability for indoor and outdoor use, affordable pricing.
Best Applications: Decorative items, furniture restoration, general-purpose metal painting.
Limitations: Longer drying times compared to fast-dry formulations, limited temperature resistance.
Krylon ColorMaxx
Advantages: Fast-drying formula, excellent color retention, good coverage, wide availability.
Best Applications: Quick projects, touch-ups, items requiring rapid turnaround.
Limitations: Lower durability than specialty metal paints, limited temperature resistance.
POR-15 System
Advantages: Exceptional rust prevention, extreme durability, chemical resistance, professional-grade performance.
Best Applications: Automotive restoration, industrial equipment, harsh environment applications.
Limitations: Higher cost, more complex application process, limited color options.
Specialty High-Temperature Paints
For metal items exposed to heat, such as grills, exhaust components, or heating equipment, standard spray paints will fail rapidly. High-temperature paints withstand continuous exposure to temperatures up to 1200°F (649°C) while maintaining color and protection.
These specialized coatings require specific preparation and curing procedures, often involving heat cycling to achieve full performance. While more expensive than standard paints, they provide the only viable solution for high-temperature metal applications.
Safety Considerations and Protective Equipment
Metal spray painting safety requires attention to chemical exposure, fire hazards, and proper ventilation. Spray paint contains volatile organic compounds (VOCs) that can cause health problems with excessive exposure, while the flammable nature of these products creates fire and explosion risks if proper precautions aren’t observed.
Personal Protective Equipment
Respiratory Protection: Use NIOSH-approved respirators designed for organic vapors. Simple dust masks provide no protection against paint vapors and should never be used for spray painting applications.
Eye Protection: Safety glasses or goggles protect against overspray and chemical splashes. Side shields provide additional protection from airborne particles.
Skin Protection: Nitrile gloves resist paint solvents better than latex or vinyl alternatives. Long sleeves and pants protect skin from overspray and chemical contact.
Workspace Safety
Eliminate all ignition sources within the spray area, including pilot lights, electrical equipment, and smoking materials. The flammable vapors from spray paint can travel considerable distances and ignite from unexpected sources.
Provide adequate ventilation to remove vapors and supply fresh air. Cross-ventilation works better than single-direction airflow for most spray painting applications.
Store spray paint containers in cool, dry locations away from heat sources and direct sunlight. Extreme temperatures can cause container failure or affect paint performance.
Maintenance and Touch-Up Procedures
Even the best spray painted metal finishes may require occasional maintenance or touch-up work over time. Proper maintenance procedures extend the life of painted surfaces while preserving their appearance and protective properties.
Routine Cleaning and Inspection
Regular cleaning removes contaminants that can degrade paint films or cause premature failure. Use mild detergents and soft cloths to avoid scratching painted surfaces. Harsh chemicals, abrasive cleaners, or high-pressure washing can damage paint films and should be avoided.
Inspect painted surfaces periodically for signs of wear, chipping, or corrosion. Early detection allows for simple touch-up procedures rather than complete refinishing projects.
Touch-Up Techniques
Small chips or scratches can often be repaired without repainting entire surfaces. Clean the damaged area thoroughly, apply primer if bare metal is exposed, and carefully apply matching paint in thin layers.
For best results, feather the edges of touch-up areas into the surrounding paint to minimize visibility. Multiple thin coats produce better color matching and durability than single heavy applications.
When to Repaint Completely
Complete repainting becomes necessary when touch-up repairs become too numerous or extensive, when the underlying metal shows signs of corrosion, or when the paint system has reached the end of its service life.
Signs that indicate complete repainting include widespread chipping, color fading, chalking, or loss of gloss across large areas. At this point, proper surface preparation and complete refinishing provide better long-term results than extensive touch-up work.
Environmental Impact and Disposal Considerations
Modern eco-friendly metal spray painting practices minimize environmental impact while maintaining high-quality results. Understanding proper disposal methods and selecting low-VOC products demonstrates environmental responsibility while often providing health benefits for users.
Low-VOC Paint Options
Water-based spray paints produce fewer volatile organic compounds than traditional solvent-based formulations while providing good performance for many applications. These products dry quickly, have minimal odor, and clean up with water rather than chemical solvents.
However, water-based paints may not provide the same durability or corrosion protection as solvent-based alternatives, particularly for outdoor or high-use applications. Evaluate project requirements carefully when selecting between formulations.
Proper Disposal Methods
Never dispose of spray paint containers in regular household trash while they contain product. Empty containers completely before disposal, following local regulations for aerosol container recycling.
Leftover paint should be taken to household hazardous waste collection facilities rather than being poured down drains or disposed of with regular trash. Many communities offer periodic collection events for paint and other hazardous materials.
Cleaning solvents and contaminated materials require similar disposal considerations. Rags soaked with paint or solvents can pose fire hazards and should be stored in metal containers with tight-fitting lids or disposed of properly after use.
Ready to transform your metal items with professional-quality results? Start your next how to spray paint metal project with confidence using these proven techniques and safety practices. For more painting tips and techniques, check out our detailed guide on spray paint cabinets for additional surface-specific advice.
